Stepping Up to the Mark (5D Mark III)
- At December 06, 2012
- By John
- In Camera, Canon, EOS 5D Mark II, EOS 5D Mark III, Gear Review
 6
6
A Good Time to Upgrade to the 5D Mark III Perhaps?
Well I’ve finally given in. Despite the price and stating I’d be unlikely to upgrade so soon, the lure of the Canon EOS 5D Mark III finally got the better of me and I’ve traded in one of my 5D bodies against a new 5D Mark III. Why now you may ask? Well the price of the 5D Mark III has dropped over £600 since the March launch and the other major factor is the impending release of Canon’s surprise package at Photokina, the EOS 6D. This new full frame model is due to start hitting shop shelves over the next few weeks and will undoubtedly have a major impact on secondhand and trade-in prices of the 5D mk-II. Thus rather than wait till my Mark-II depreciated substantially I thought I’d take the hit now. In the US Canon have already started offering rebates against the 5D mk-II to shift the remaining bodies off the shelves, and here in the UK new mk-II’s seem comparatively rare already. So if you are thinking of upgrading from a 5D mk-II you may want think about doing it pretty soon.Firstly I must state that my observations presented here are just from the point a view of a 5D mk-11 owner who has upgraded, so don’t expect a detailed mk-III review here. I’ve really just highlighted some of the changes you may encounter should you decide to take upgrade route. Also, like many I was a tad disappointed when the 5D Mark III specifications were finally released by Canon. Although quite a lot appealed, the lack of in-built GPS, no substantial pixel increase and that price just knocked the 5D Mark III off my radar. I longed to have the faster frame rate for my wildlife photography, high ISO ability, weather sealing, better ergonomics, auto-bracketing of up to 7 frames, the auto-level and the potential of HDR, but that over inflated, rip-off price, just made me wince. Thankfully a significant price drop since then and some recent financial benefits meant that for once I could actually afford it.
First Impressions & Ergonomics
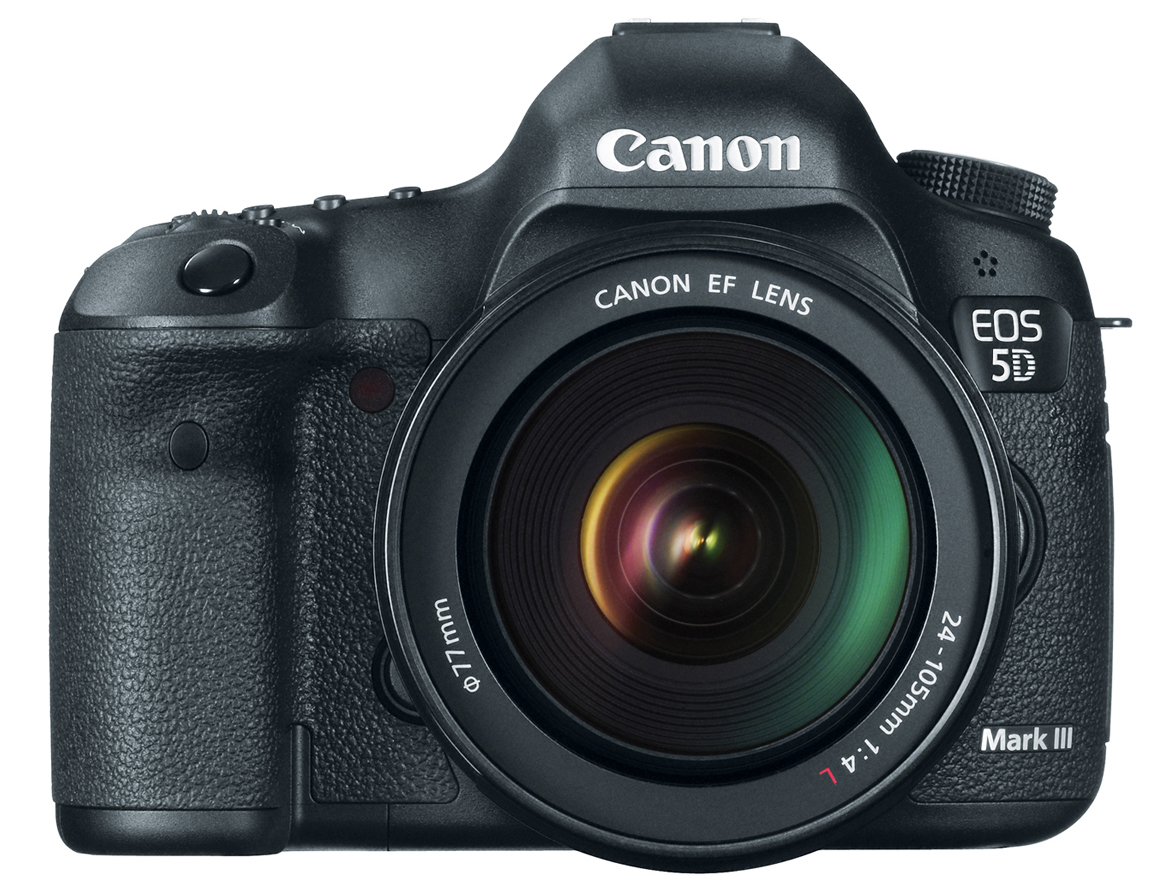
The first thing that struck me on picking up and holding the 5D Mark III, is just how much chunkier and heavier it is compared to the mk-II. It feels more substantial, stockier and sturdily-built, almost like an existing 5D on steroids, and it oozes quality. This is not something that you can really perceive from any picture or specification list, but only by actually holding one yourself. This is definitely the heavyweight version of the 5D. Having had one 5D mk-II die after prolonged damp conditions in Iceland earlier this year, better build quality and weather sealing was pretty much a pre-requisite for me to even consider an upgrade. So this tank-like, weather-sealed build is extremely welcome by me. I just hope the 5D Mark III lives up to be as robust as it looks.
The 5D Mark III feels more substantial, stockier and sturdily-built, almost like an existing 5D on steroids, and it oozes quality.
The 5D Mark III is slightly larger than it’s predecessor, with a noticeably more bulbous viewfinder housing atop to accommodate the larger prism for the 100% viewfinder coverage. It’s a more curvier camera too, with more sculpture indents for buttons and fingers, and has a smoother profile and more rounded corners. In fact the 5D Mark III is quite a hansom beast. Some of the buttons are larger and easier to use, especially the newly positioned depth-of-field button. The hand grip protrudes slightly further forward but has a much deeper grip recess for your index finger, a longer scalloped chamfer around the shutter button, and a deeper recess on the back for your thumb, so although heavier, the 5D mark III is actually much easier to hold. The whole camera seems more ergonomically pleasing and it would appear at last Canon have listened to it’s public. 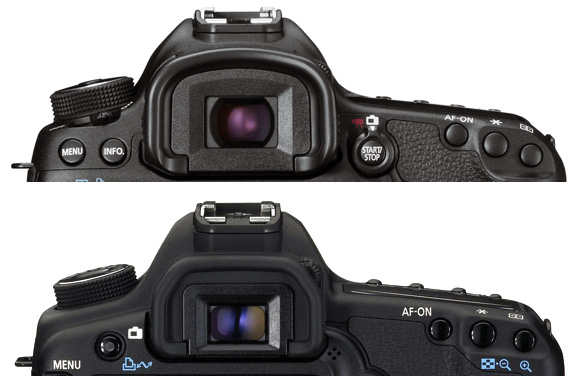
The 5D Mark III uses the EG eyepiece, the same type as used on the 7D and IDs-III and which utilises a different fitting to the one seen on the 5D mk-II. The eyepiece is wider and curvier than the 5D mk-II version and can be only be removed by squeezing the sides and sliding upwards, so can’t be accidentally pulled off and lost (as happened to me). This is a big improvement on the rather awkward-to-remove predecessor but bad news if you have an older version of the angle-finder C which didn’t come with the EC-C and ED-C adaptors (does anyone know where I can just the adaptor?). The eyepiece is still formed from rubber and plastic, which on a camera with a list price of just under £3000 looks rather out of place. The memory card compartment cover is still plastic although now sports an outer rubberised skin to match the camera body, and has a weather-seal gasket. Although far more solid than its predecessor, it’s still seems a potential weak point. The card compartment now contains dual card slots with a SD card slot to complement the standard Compact Flash. UDMA CF cards are supported as are SDHC/SDXC SD cards so you should be able to achieve a significant improvement in read and write speeds and use much higher capacity cards.
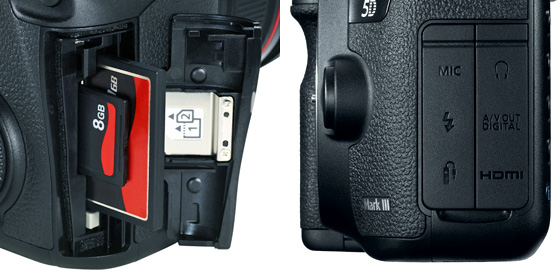
The 5D Mark III sports dual card slots and the new easy-open terminal covers
Another improvement on the 5D Mark III is the recess below the the rubber terminal covers which is now larger and much easier to get your finger underneath to open them. If you’ve ever had to attach a cable release on a cold, frosty, wintry morning, then you’ll really appreciated this subtle improvement. There’s also a rubber pad on the base-plate around the tripod socket, but I somehow doubt this produdes far enough to prevent a metal-surfaced, quick-release plate from eventually scratching the body. I usually cut and fit a small piece of black felt to place between my quick-release plate and camera, which seems to work well.
Buttons and More Buttons
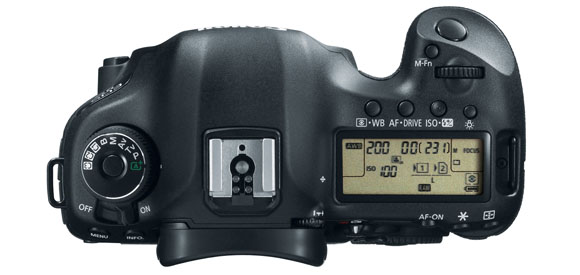
The On/Off Power Switch has moved and is now located around the base of the Mode Dial on the top of the camera, but a Lock switch still remains where the old power switch used to be. And talking of the Mode Dial, this now can only be changed by depressing a new small centre button, then rotating. This is going to take a bit of getting used to, but it does prevent it from being accidentally changed, which has happened to me in the past when taking the camera out of my backpack. A few other buttons have changed position too. The Menu and Info buttons have migrated to the top of the back, just left of the eyepiece, where the old Print/Live-View button used to be. There is a new dedicated Video/Live-View button just to the right-hand side of the Eyepiece which makes much more sense. There are some new buttons too, and of a great relief to me is a dedicated Quick-menu button. This sits between the rear Quick Control Dial and the Multi-Controljoystick just to the right of the LCD. Depressing the center of the joystick to invoke the Quick Menu on the previous model used to drive me nuts. Despite almost three years of use I have never seemed to have developed the right technique for this, and it always seems to take several repeat presses before the Quick Menu popped up. All Hail the new Quick menu button then!On the 5D Mark III there are still five buttons to the right of the rear LCD, but these are no longer recessed and the delete button no longer has the little upset in the middle. The Delete button is slightly lower that the four above, but without the little centre spot it is not as tactile and easy to feel in the dark. I’m not sure why Canon saw fit to change this. The Playback button sits in an identical position with a dedicated Zoom button now logically positioned just above. Above that you now have a new Rate button to assign star ratings to your images. I thought the latter may end up being pretty redundant as I’m sure most photographers will undoubtedly reserve rating photographs to when viewed on a computer screen, although I have used it in the field. Lastly, above the Rate button sits what Canon calls the Creative Photo button, which accesses the Picture Style menu which is now joined by the new Multi-exposure and HDR modes. You’ll also notice now that the text and icons are actually on the button surface rather than adjacent to then, so I hope these don’t begin to wear off after heavy use.
The buttons to the front of the top LCD display have not changed much, although are flatter in shape. The ISO button now sports a little centre upset to make it more tactile and easily located by touch so this is a welcome addition. One new button does appear on top however, a small Multi-Function (M-Fn) button, which sits just above the shutter button. This is used in conjunction with the AF Point Selection button to select your focus points and it may take some getting used to for mark-II owners.
Screen and Menus
The rear of the 5D Mark III is dominated by a new and larger 3.2-inch LCD, sporting a total of 1,040,000 pixels; an increase of about 13% on it’s predecessor. This is now the same aspect ratio of a full-frame image, so when reviewing an image you no longer have a black border at the top, thus any picture info has to overlay the image, although I have to say Canon have implemented this quite nicely. If you’ve watched the video above you can see that the on-screen menu system has been smartened up too, with iconised tabs across the top for each category and a new addition of a special menu tab just for the AF settings. Each menu category have a varied numbered of sub-pages which are show by a series of square dots below the leftmost tab. Using the Quick Menu button moves from tab to tab; using the Main dial scrolls through the pages, and the Control dial moves through the items on each page. The menus are easier to read and navigate through, although the naming of some of the items is still rather confusing. Playback has some enhancements too
Live View
Live View has been enhanced on the 5D Mark III and now has a dedicated button which can be flipped between still or video mode which is much easier to use. You can overlay more information on your live View screen with successive pushes of the Info button, and even display a live histogram. You can even display and adjust your AF points on-screen and overlay the digital-level. You also have the choice of face-detection AF mode in Live View. You also have the option of setting different aspect ratios (3:2, 4:3, 16:9 & 1:1), which blanks out areas of the screen that fall out side the selected ration. Jpegs are recorded cropped, but RAW will still record the full 3:2 ration. Unfortunately accessing the alternative aspect ratio settings can only be done vie the menus, which is a little clunky.
AF Point Selection & Modes
Moving up from the 5D mk-II I’ve found the new auto-focus system on the 5D Mark III a bit daunting to say the least. With the mk-II this was a pretty simplistic affair with only 9 auto-focus points to choose from, but now you have 61! Selecting an auto-focus point on the mk-II was achieved by pressing the AF Point selection (magnify) button and either rotating one of the control dials or using the multi-controller. With this you could either selected an individual AF point or the whole lot and was achieved either relatively quickly. On the 5D Mark III I’m afraid, it’s a whole new kettle of fish and to be honest, not something I’m fully comfortable with just yet. You still hit the same AF point selection button, but then you have to use the new tiny Multi-function (M-Fn) button (which is just above the shutter button) and selection the AF Area Selection mode first. You have six AF Area modes, and each press of the M-Fn button cycles through the six modes, although you can disable some of these modes through the menu settings. When you have decided on your mode, only then do you use the control dials or the multi-controller to select your desired AF point or AF area. Sound complicated, well yes it is, unbelievable so, and I can’t help but feel a far simpler method could have been devised for this. Just to put this in perspective, AF mode and AF point selection required 5 pages in the 5D mk-II manual, for the 5D Mark III that has expanded to 15 pages so be warned.
As I said above you now have 6 AF Area Selection modes. The first is simple AF or 61-Point Automatic mode where the camera selects the AF point. You now also have two Single-point modes where you can select an individual AF point. One is just like before, the other, which is referred to as Single-point Spot AF (pinpoint) uses an even smaller area to focus and can for example, be used to focus on an animal through a wired cage. The only difference you’ll see in your viewfinder to distinguish either is one shows an empty square, whilst the other doesn’t. You also have the choice to select groups of AF points, which just to confuse things are called AF Point Expansion modes. There are two AF Point expansion modes, one which selects adjacent horizontal and vertical points (5 AF points), the other which selects all surrounding points (9 AF points). You can move these zones up and down using Quick Control dial, and horizontally using the Main dial, or either way with the Multi-controller. Moving centre point of these zones to the far edges can further truncate the group of AF points by removing one row. Lastly you have Zone AF, where the 61 AF points are divided into 9 zones.
If all these different AF point and area selection modes seem rather overwhelming or superfluous to your own individual requirements, then you can disable them. This is done by in the forth AF menu page, under Select AF areas selec. mode (rather dreadful title), where you can temporarily remove all but the Single Point AF mode. If none of this makes sense, then perhaps this YouTube video from Canon explains things rather more succinctly.
By the way, if you’re wondering just how the guy in the video manages to display the focus points on the 5D Mark III LCD whilst in Live View mode then you need to set the AF Mode to Quick Mode in the menu settings as this is not the default straight out the box.
AF Configuration
One of the major upgrades to the 5D Mark III is the AF system, which is the same ss Canon’s flagship DSLR the 1DX. This is far more sophisticated than the AF system provided in the 5D mk-II. As I touched on above, with this added capability comes a new level of complexity and thus there is now a separate menu tab dedicated just for AF settings and configuration. This new level of AF functionality will be completely new to 5D mk-II owners and will take time to come to grips with. To make things a little easier (perhaps not the best word), Canon have provided 6 presets of what they call AF cases. These are available on the first page of the AF menu. Each case is depicted by a small icon to best represent a sporting activity the settings are fine tuned to suite, but this shouldn’t confuse the user into think they are only exclusively for sporting action. Thankfully each has a brief 2 line explanation of what they do. You can of course set your own configuration, but this would be for experienced users only. I’d find it rather difficult to explain these modes and I found the user manual a little confusing. Thankfully the following Canon video makes it a little easier to understand.
Welcome Enhancements
There are several enhancements on the 5D Mark III that I’m really pleased to see, one or two of which, in my opinion were serious omissions from the last model. A single zoom button can now be found to the left of the rear LCD screen. Pressing this button during playback mode now zooms to a predefined setting. This can be set anywhere from x1 to x10, but more importantly it can be set to Actual Size, that’s 100%; something many photographers have been asking for quite some time. It will also zoom in on the AF point where focus was locked. A second press of the zoom button returns to full screen view, whilst rotating the Main dial now zooms in or out. However, I’m so used to having my zoom button on the right, that I’ve frequently found myself pressing the AF Point selection button when I wanted to zoom, so a bit of re-learning is required here.
On the 5D Mark III you can now also set the upper and lower limits for Auto-ISO, so instead of being just a gimmick (as it was on the mark-II) this now has the potential to become quite a useful tool, especially when assigned to one of the custom setting C1 to C3. However, why this wasn’t added to the mk-II by a firmware upgrade is still beyond me. Another nice touch on the 5D Mark III is the new depth of field button, which has switched sides to the opposite flank of the lens housing. This is now a much larger, broad, flat topped button, positioned rather nicely for your third finger of your right hand whilst holding the camera grip.
On the 5D Mark III auto-bracketing can now be set to 3, 5 or 7 frames, and likewise there is now inbuilt HDR functionality using a similar sequence of frames. With the HDR to have the option to retain the original frames or discard them and just keep the resulting composite. You also have the ability to do multiple exposures, something film cameras have had for years. Funny how this one’s taken so long to be included into a DSLR, however I suspect like me, many of you would much prefer the control offered within photoshop to produce composites.
The 5D Mark III has a new viewfinder that now provides 100% coverage and uses the same translucent, liquid crystal display as seen in the EOS 7D. In addition to being able to display all 61 AF points in various configurations, you can now even superimpose a grid and even have some of the AF points act as the digital level.
The AF system is greatly enhanced as we know, but of significant note to existing 5D mk-II users is that it’s just so much more responsive and will focus in much lower light before. As Landscape photography is my passion, I’m often out in pre-dawn hours messing around in the near-dark and with the 5D mk-II it was pretty much manual focus ot nothing. However with the 5D Mark III I’ve been amazed just how dark it’s been and I’ve yet still been able to achieve auto-focus.
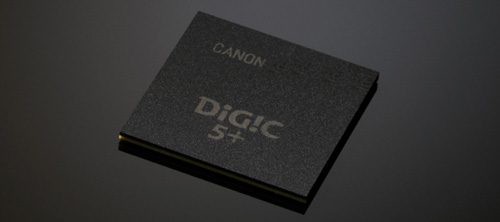
The Dig!c5+ processor chip used in the EOS 5D Mark III
Thankfully the 5D Mark III also takes the same battery LP-E6 battery as the 5D mk-II, so no need to buy additional spares, and despite all the additional functionality battery life seems just as good too.
What’s still Missing
There are still a few notable absentees from the 5D Mark III. There is still no dedicated mirror lock-up button despite it being request in countless reviews since the original 5D went on sale several years ago. No shutter blind as mentioned above. No built-in GPS, although at least the the 5D Mark III will work with Canon’s GP-12 hotshoe mounted GPS Receiver. I have purchase one of theses so I hope to review that at some later stage. You still can’t overlay the histogram on a image in playback mode, although you can in Live View. I gather Nikon owners have had this capability for some time but sadly not for us 5D owners. There is no still no built-in WiFi capability, but at least Canon state it’s compatible with Eye Fi cards. Lastly, you can still only set the maximum exposure time to 30 seconds in-camera. Why this is still limited to just 30 seconds? Well I guess Canon still want more of your dosh making you buy a remote.
Light Leak Issue
One concern I had was that some early versions of the 5D Mark III seemed to have a light leak issue which was first reported here and later acknowledged by Canon. This only appeared to occur however, in low light situations where illuminating the top LCD panel could affect the meter reading, something that would obviously be of serious concern for dawn and night landscape photographers. Thankfully this does not occur on my 5D Mark III so Canon seems to have fixed this problem.
Image Quality
I guess you’re perhaps surprised I’ve left this till last. Well to be honest it was never my intention to cover image quality of the 5D mark III in this post as I just wanted to focus on the changes mk-II owners will encounter. There are already a plethora of highly specialized, technical reviews on the 5D mk-II’s image quality to be found on the web, several of which I’ve linked below. Plus I’ve only had the camera for a matter of weeks so I’m not really in a position to provide a professional opinion. I will say however, that initial image quality seems to surpasses the mk-II, particularly in low light and at higher ISO values, and seems to retain better detail in shadow areas. With the 5D mk-II I’d seldom ever go higher than ISO 400 and even at that value, I found detail often suffered; with the 5D Mark III even ISO-800 seems pretty dam good, but I need to experiment far more and some of the online reviews are suggesting you can go far higher than that.
It’s only been a few weeks but so far I’m very impressed with the EOS 5D Mark III despite some obvious omissions.
Summary
So far so good. It’s only been a few weeks but I’m very impressed with the EOS 5D Mark III despite some obvious omissions. The camera handles wells and most mk-II owners will be immediately within their comfort zone here, although expect a little to spend a little extra time mastering the new AF controls. Would I advise 5D mk-II owners to upgrade? Well it’s probably a bit too early for me to give a definitive answer to that question and even through the price has come down it’s still a big financial leap from the mk-II price category. Picture quality appears marginally better that the mk-II at normal ISO’s, but I suspect that it would be hard to tell the difference in prints up to A3 or even A2 size for most subjects. Where perhaps it will tell is for long exposures, high ISO and low light photography, where shadow detail, contrast and noise may be much improved upon. Of course it’s a highly desirable camera, and certainly temptation got the better of me, however I don’t regret the decision so I guess it will come down to whether it’s affordable for you or not. It certainly won’t disappoint. One big caveat for potential upgraders is just how good will the 6D be? On paper it sounds as though it really should have been the 5D Mark III and it even has built-in WiFi, GPS, takes the same LP-E6 battery and costs far less, plus once it’s been out several months undoubtedly the price will fall too. By then of course your old 5D Mark II will be worth far less too. Catch 22 I guess but at least now you have a choice.
Online Reviews & Further Reading
- Canon EOS 5D Mark III – Specifications
- Canon EOS 5D Mark III – Brochures & Manuals
- 5D Mark III Review – dpreview
- 5D Mark III Review – The Digital Picture
- 5D Mark III Review – Photograpy Blog
- 5D Mark III Review – DXO
Photographer Reviews of the 5D Mark III
- Martin Bailey (with some good high ISO testing)
- Niel van Niekerk
- Jeff Ascough
- Phil Drinkwater (wedding specific)
- Ken Rockwell

Jim
Hi would you mind letting me know which web host you’re working with?
I’ve loaded your blog in 3 completely different web browsers and I must say this blog loads a lot faster then most.
Can you recommend a good web hosting provider at a reasonable price?
Kudos, I appreciate it!
John
Hi Jim, I use TSO Hosts, mainly because my site is in WordPress and they provide very good support for wordpress sites. They are also pretty good value, and when you call tech support (which I have done on numerous occasions) you get to speak to someone straight away in the UK. I can thoroughly recommend d them. I was new to wordpress when I set up the site and they were very helpful.
benahavis villas
Thanks for sharing your thoughts on 5d mark iii. Regards
Eyepeice Blind for EOS 5D Mark-III | johnbirchphotography
[…] I mentioned in my article Stepping Up to the Mark-III, Canon’s third incarnation of the EOS 5D, the Mark III, still lacks a proper eyepiece blind […]
Scott
You mentioned in this post that you had an effective and inexpensive solution to an eyepiece cover (eyepiece blind) for the 5D Mark III, and that you would cover this in a later post. I haven’t found a post on this. What was your solution? I am desperate for one myself, and wouldn’t mind saving money if you’ve got a good idea.
John
Thanks for reminding me Scott. See my latest blog post below and let me know if this works for you:
http://www.johnbirchphotography.com/2013/07/eyepeice-blind-5d-markiii/