Essential Development – 20 Great Techniques for Lightroom 4
- At November 01, 2012
- By John
- In Book, eBook, Instruction, Lightroom 4, Lightroom News, Review
 0
0

New Book from Craft & Vision
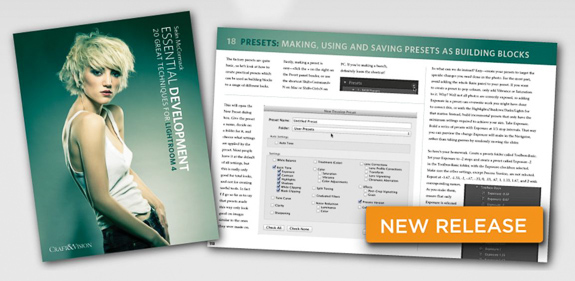
There is a new eBook offering from Craft & Vision entitled Essential Development – 20 Great Techniques for Lightroom 4. It’s also by a new author to the Craft & Vision stable, Seán McCormack, who many may recognise from the Adobe Lightroom forums and for his regular Lightroom Blog at Pixeq. Seán has been involved with Lightroom since the early beta versions where his forum activity of attracted the attention of Adobe. He was subsequently invited to become a Lightroom beta tester and has been involved with all Lightroom editions since. Thus he has a well established pedigree as an authority on Lightroom.
I’ve been an avid Lightroom user since those early beta versions too, having migrated from the original Rawshooter program by Pixmatic (where Adobe acquired the original Raw processing software). In that respect I’m no novice and would probably consider myself an advanced user, so I did wonder whether I’d have much to gain from yet another Lightroom tips booklet. Well, as you’ll find out I was quite pleasantly surprised.
Two Versions
This eBook comes in two flavours, the normal Craft & Vision PDF priced at just $5.00, and a $7.00 version which includes a set of 85 Lightroom presets. I’m afraid I plumbed for the cheaper option, having being dissuaded buying the presets by some of the comments on the C&V website, and also by the fact I prefer to create my own presets. The PDF comes in at a bumper 125 pages, laid out in Craft & Vision’s typically classy style, with lots of well produces images and illustrations, so offers plenty of bang for your five bucks.
So What’s Inside?
Well, the first few tips deal with a some introductory basics to get the books started, such as the Histogram and the Basic Develop panel and although this served as an interesting refresher of some lesser known shortcut keys, I found little new here; this seemingly for the less experienced users. However, the latter does conclude with a cute method of generating a pseudo HDR look which may interest some.
The ebooks then progresses with a section on camera profiles which is not something I’ve dabbled much with in Lightroom, but I may be tempted to experiment a little more now having read this. Making White White is the title of next section, and here the eBook starts to get much deeper with a lengthy section on correcting white balance. Use of the eye dropper tool and a grey card are well explained, but what I found most interesting is the example of a low light landscape. In this scene the sky colour temperature is fixed using the global WB slider, but then the torch-lit foreground is corrected by painting on another WB setting using the brush tool; a technique I’d not contemplated before. Clever stuff.
I’m not a fashion photographer, but if that’s you bag or if you’re a wedding or portrait photographer then tips 5 through 6 provide a whopping 18 pages on Beauty Retouching, which include some great techniques and examples to improve your retouching skills. I’m aware of the effect of negative clarity for softening skin, the spot tool to remove blemishes, and whitening eyes and so on, but the term Face Carving was something completely new to me. This is the process of dodging and burning to re-sculpture a model’s face. This is adeptly illustrated from start to finish with amazing results, but if it was me I don’t think I could have resisted cloning out the model’s somewhat ghastly lip stud!
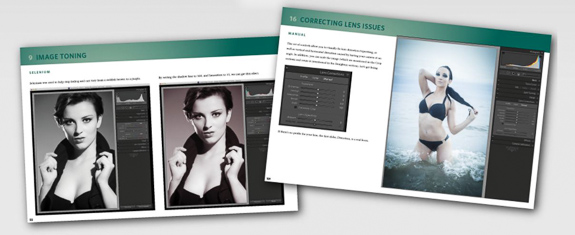
Tips 7 through 9 approach stylising your image by emulating Cross Processing, Achieving a Filmic Look, black and white conversion, and Image Toning, all beautifully illustrated with great examples, but predominantly from the fashion angle. Cropping and Straightening are dealt with next, which also shows how to crop outside the frame to add a grey border. I also found out here that Lightroom only remembers your last 5 custom crops; why we should be limited to just 5 is not explained, but is perhaps something for LR5 development team to address. The next section deals with Fixing Skies by using the graduated filter tool, but not just correcting for exposure, but also using a colour swatch and white balance adjustments to modify the look of the sky. This is followed by a method on how to achieve that miniaturisation look from a tilt-shift lens using negative sharpness and gradients.
Tip 14 is all about sharpening and many LR users are often confused by the different sliders offered in the Detail panel and how they should use them. This is nicely explained especially halo suppression using the detail slider and how the masking slider works, which really should always be used whilst holding down the ALT or Option key on the Mac to see exactly what parts of your image are going to be sharpened. I would perhaps like to have seen some more numerical values offered for different types of scenes. I seldom go above a 0.8 radius for landscapes, but may use a radius of more like 1.0 to 1.5 for portraits, I use masking to limit what needs to be sharpened, then dial in what amount looks best, but seldom exceed a value of 60. All the examples sharpened presented are landscapes, and as beautiful as these Icelandic images are it would have been nice to see a portrait example too. The next tip continues with Detail panel and explains how to Reduce Image Noise. The differences between colour and luminance noise are nicely expounded, and are the methods of how to correct them.

Lens correction has been enhanced under LR4 and is a tool that every user needs to get to grips with. Not surprisingly this is dealt with in some detail. Of particular interest to me was how to get around the problem of not having Lightroom present default lens profiles for JPG files. A fix is presented by the way of a hacking the lens profile files, and changing one of the parameters. This tip was probably worth the entry fee alone for me. I had this very problems with a set of JPEGs I shot in Antarctica last year, but managed a work-around by syncing the lens settings from RAW images taken with the same lens and then adjusting to suite. Chromatic aberration is suitable well dealt with, and use of the eye dropper is admirably demonstrated in removal of the purple and green fringing. I’d not fully understood how to use the sliders before so gained a lot from this tip. Manual correction of lens distortion, perspective and vignetting are also explained, which is followed by some creative techniques using the post-crop vignette tool.
Since this ebook comes with an option to include 85 presets in your download, it’s no surprise presets are addressed too, although not in as much depth as I had anticipated. However Sean’s methodology in using presets is somewhat different to what most users may expect. He uses them as rather simple building blocks, and suggests the reader create a suite of Exposure Adjustments from +2 to -2 in 1/2 stop intervals (thus exposure values of -2, -1.67, -1.33, -1, , -.33, 0, +.33, +1, +1.33, +1.67, +2), likewise for Contrast, Clarity, Vibrance and so on. To be honest I’m quite happy using the sliders rather than pre-sets for individual values so this idea did not appeal to me, although I can see that these provide quick and easy steps. However, you may want to think carefully on wether you would find this technique useful before you choose the presets to download.
The last couple of tips deal with synchronising setting across multiple images and editing in Photoshop, with the latter focused on merging to HDR and creating panoramas.
A Worthy Buy?
Overall I found this an excellent ebook and I can quite happily say it exceeded my expectations. I did find the writing a little stuttery to begin with, with the style perhaps not as eloquent as the likes of David duChemin, but it does improves as the book progresses as the author begins to hit his stride. There is some very good information here and this ebook has plenty to offer both the intermediate and some for the advanced user, although perhaps probably not the best starting place for a novice as a moderate grounding in Lightroom is assumed. It’s well worth the £2.99 and offers more wealth and depth of information than the typically magazine offerings. Craft & Vision have certainly found a niche market here and Essential Development is undoubtedly a welcome and worthy addition to the Craft & Vision stable. Go ahead and treat yourself !
[xrrgroup] [xrr rating=4.0/5 group=test label =Readability:] [xrr rating=4.5/5 group=test label=Content:] [xrr rating=5.0/5 group=test label=Value:] [xrr overall=true group=test label=Overall:] [/xrrgroup]
Where to Buy

